Water and animations (GTA2)
Main Page > GTA2 > Modding Tutorial > Water and animations
In this tutorial, we're going to add water and some animations to our map. Water and animations may seem like a strange combination. However, water is actually just an animation with an extra function.
Water
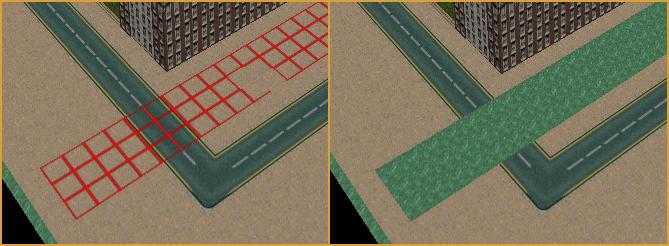
First, we have to decide where we want to create water. Find a nice spot for a river and make sure part of it runs through the road, so we can build a bridge there later. Select the area you want to change into water and press SHIFT + DEL to delete it. You'll see water emerge beneath it, because water is standard present in a new map (if not, or you want to create water somewhere else, you can do so with tile 608).
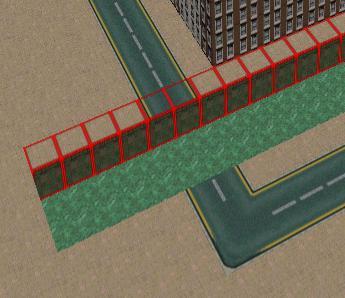
Fill in the walls of the quay with a fitting tile.
Animations
Now we have a river. Would we put this map in game, you wouldn't drown if you fell into the water. You would 'hang' onto the water without being able to move. This is because the water isn't animated yet: it is a still image.
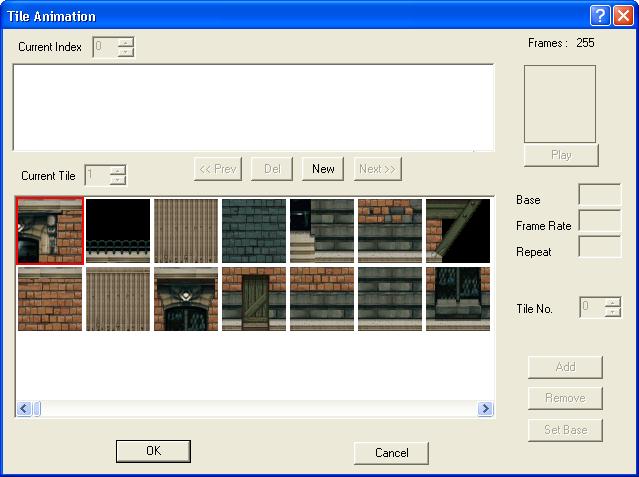
Go to Edit > Animation. A window will pop up:
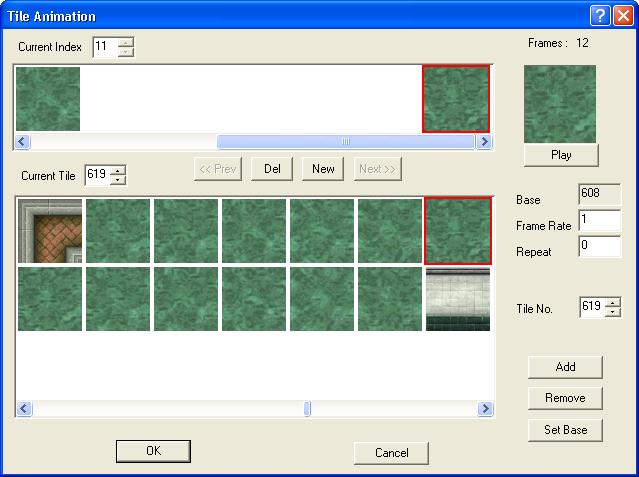
In this window, you can create new animations. Click "New". Now find tile 608 in the bar in the lower half of the screen and double click on the tile. The tile will appear in the field at the top of the window, which displays the tiles of the new animation. Doubleclick on all tiles you want in the animation. For water, these are the tiles 608 to 619. If you press a wrong tile, you can select it in the top field and remove it by clicking "Del".
When you have selected all tiles, the window looks something like this:
In the upper right corner of the window, you'll find an image displaying the animation. Press "Play" to show the current animation. You can alter the animation speed with "Frame Rate". The default animation speed for water is '2'. Beneath that, you see "Repeat", which is used to set the amount of cycles the animation should run. To make it repeat endlessly (like water should), set this to '0'.
It is important to know that "Base" is the base tile: only this tile shows the animations, and the other tiles used in the animation do not.
Click "OK" to save the animation. Water will now be animated. You can also drown in it now, because the used tiles are set to "water" in the *.sty file. Of course, you won't drown in other animations.
Notes
- Water gives your map variation. When designed properly, it will make your map less boring.
- Water is a nice 'natural border' you can use as the edge of your map.
- Animations are nice details you can add to your map. Examples of animations you can use for your map are tile 728, 742, 754 and 825.
| Mapping | Map Editor · Buildings · Roads · Water & animations · Slopes · Flat tiles · Collision info · Level edge · Zones · Putting a level ingame | |
|---|---|---|
| Scripting | Declarering: | Main script · Script Compiler · Code lists · Commands · Vehicles · Objects · Sounds · Characters |
| Programming: | IF · WHILE · COUNTERs · Subroutines · THREAD TRIGGERs · Kill Frenzies | |
| Both | Manual · Lighting · Car shops · Cranes & crushers · Gangs · Subway · Multiplayer levels | |
| File types | .gci · .gmp · .gxt · .mis · .mmp · .scr · .seq · .tmp · .sty | |
| Other | Texting · Physics · Creating vehicles · Terminology · Installing levels | |


