Creating roads (GTA2)
Main Page > GTA2 > Modding Tutorial > Creating roads
Since the game is called "Grand Theft Auto", we definitely need roads.
Creating the road lane
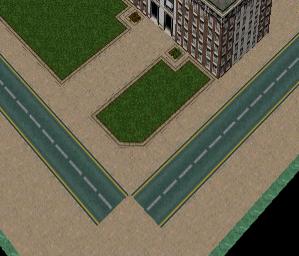
First, we have to create the actual road with tiles. When you look up tile 276 in the Tile Selector, you'll notice it's a half road. So use it to create one half of a road on the ground. You do not have to select anything, since you're drawing the road directly onto a already existing surface. To make the other side of the road, you have to mirror the tile by using the buttons in the bottom right corner of the Tile Selector. The first buttons rotates the tile, and the others can flip the tile vertically or horizontally. Flip the tile and draw the other side of the road. Now create a second road in the other direction so the road has a bent. The road should look like this:
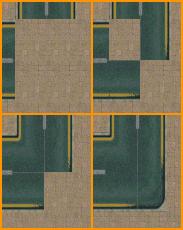
The bent itself can be made with tiles 262, 265 and 279. You have to rotate and flip them several times to get them in the right position.
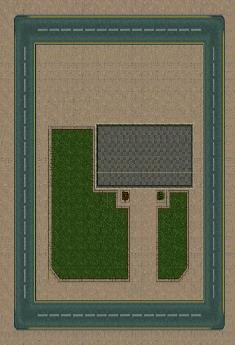
To make the small road network complete, you'll have to connect the start and end of the road. GTA2 can't handle dead ends and cars can't turn around tight bends to drive back. This is why every road network in GTA2 consists of circles.
Adding road arrows
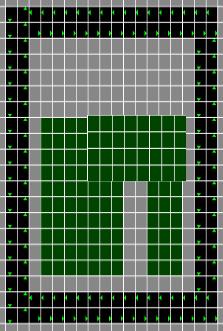
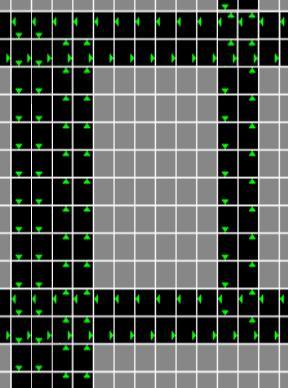
Your road may look like a road, but it's actually still pavement, which means it will be roamed by pedestrians in stead of cars. To solve this, you have to select a part of the road and select 'road' in Block Type. When you view the road in block type mode now, you'll see the road is black and has little green arrows on it. These arrows show the vehicle paths. The editor tries to put the arrows in the most logical direction. If this isn't correct, you can change them by selecting the blocks with wrong arrows and tick the boxes beneath Arrow, Green.
| L: | Left |
|---|---|
| R: | Right |
| U: | Up |
| D: | Down |
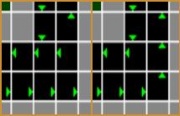
Select every part of the road and set in to block type 'road'. In block type mode, it will look like this:
The arrows at the corners won't be right, so you'll have to correct them manually by selecting the wrong arrows and tick the right arrows in Arrow, Green. Imagine the vehicle paths as a conveyor belt: the car will follow the arrow. When it drives of a straight vehicle path onto a vehicle path in another direction, it will turn and follow the new vehicle path. Roads only need more arrows on one block at junctions, not in corners. See this before-after screen as an esample:
Correct all bents to complete your first road network.
To make junctions, you sometimes need to put more arrows on one block. The screen below shows some simple junctions. Bigger junctions may look complex, but work in exactly the same way.
Notes
- When a car can choose between driving straight ahead or turning, it will always drive straight ahead, unless the junction has a traffic light. More about traffic lights later.
- Make sure there's enough space next to a road, like a pavement. This makes sure there's room to bypass heavy traffic so players won't get stuck. This is especially important near corners, because vehicles need room to turn.
- The red arrows are meant for mission paths, but aren't used.
- The line across some road tiles let cars stop for a moment before the move on.
| Mapping | Map Editor · Buildings · Roads · Water & animations · Slopes · Flat tiles · Collision info · Level edge · Zones · Putting a level ingame | |
|---|---|---|
| Scripting | Declarering: | Main script · Script Compiler · Code lists · Commands · Vehicles · Objects · Sounds · Characters |
| Programming: | IF · WHILE · COUNTERs · Subroutines · THREAD TRIGGERs · Kill Frenzies | |
| Both | Manual · Lighting · Car shops · Cranes & crushers · Gangs · Subway · Multiplayer levels | |
| File types | .gci · .gmp · .gxt · .mis · .mmp · .scr · .seq · .tmp · .sty | |
| Other | Texting · Physics · Creating vehicles · Terminology · Installing levels | |

